


Product Guide GMMK PRO FlexKit
PRODUCT GUIDE
GMMK PRO FlexKit
Overview
The GMMK PRO FlexKit gives GMMK PRO owners unique customization options to fine-tune the typing feel and acoustic properties of their keyboard.
The FlexKit is only compatible with the GMMK PRO and does not include switches, keycaps, or a PCB.
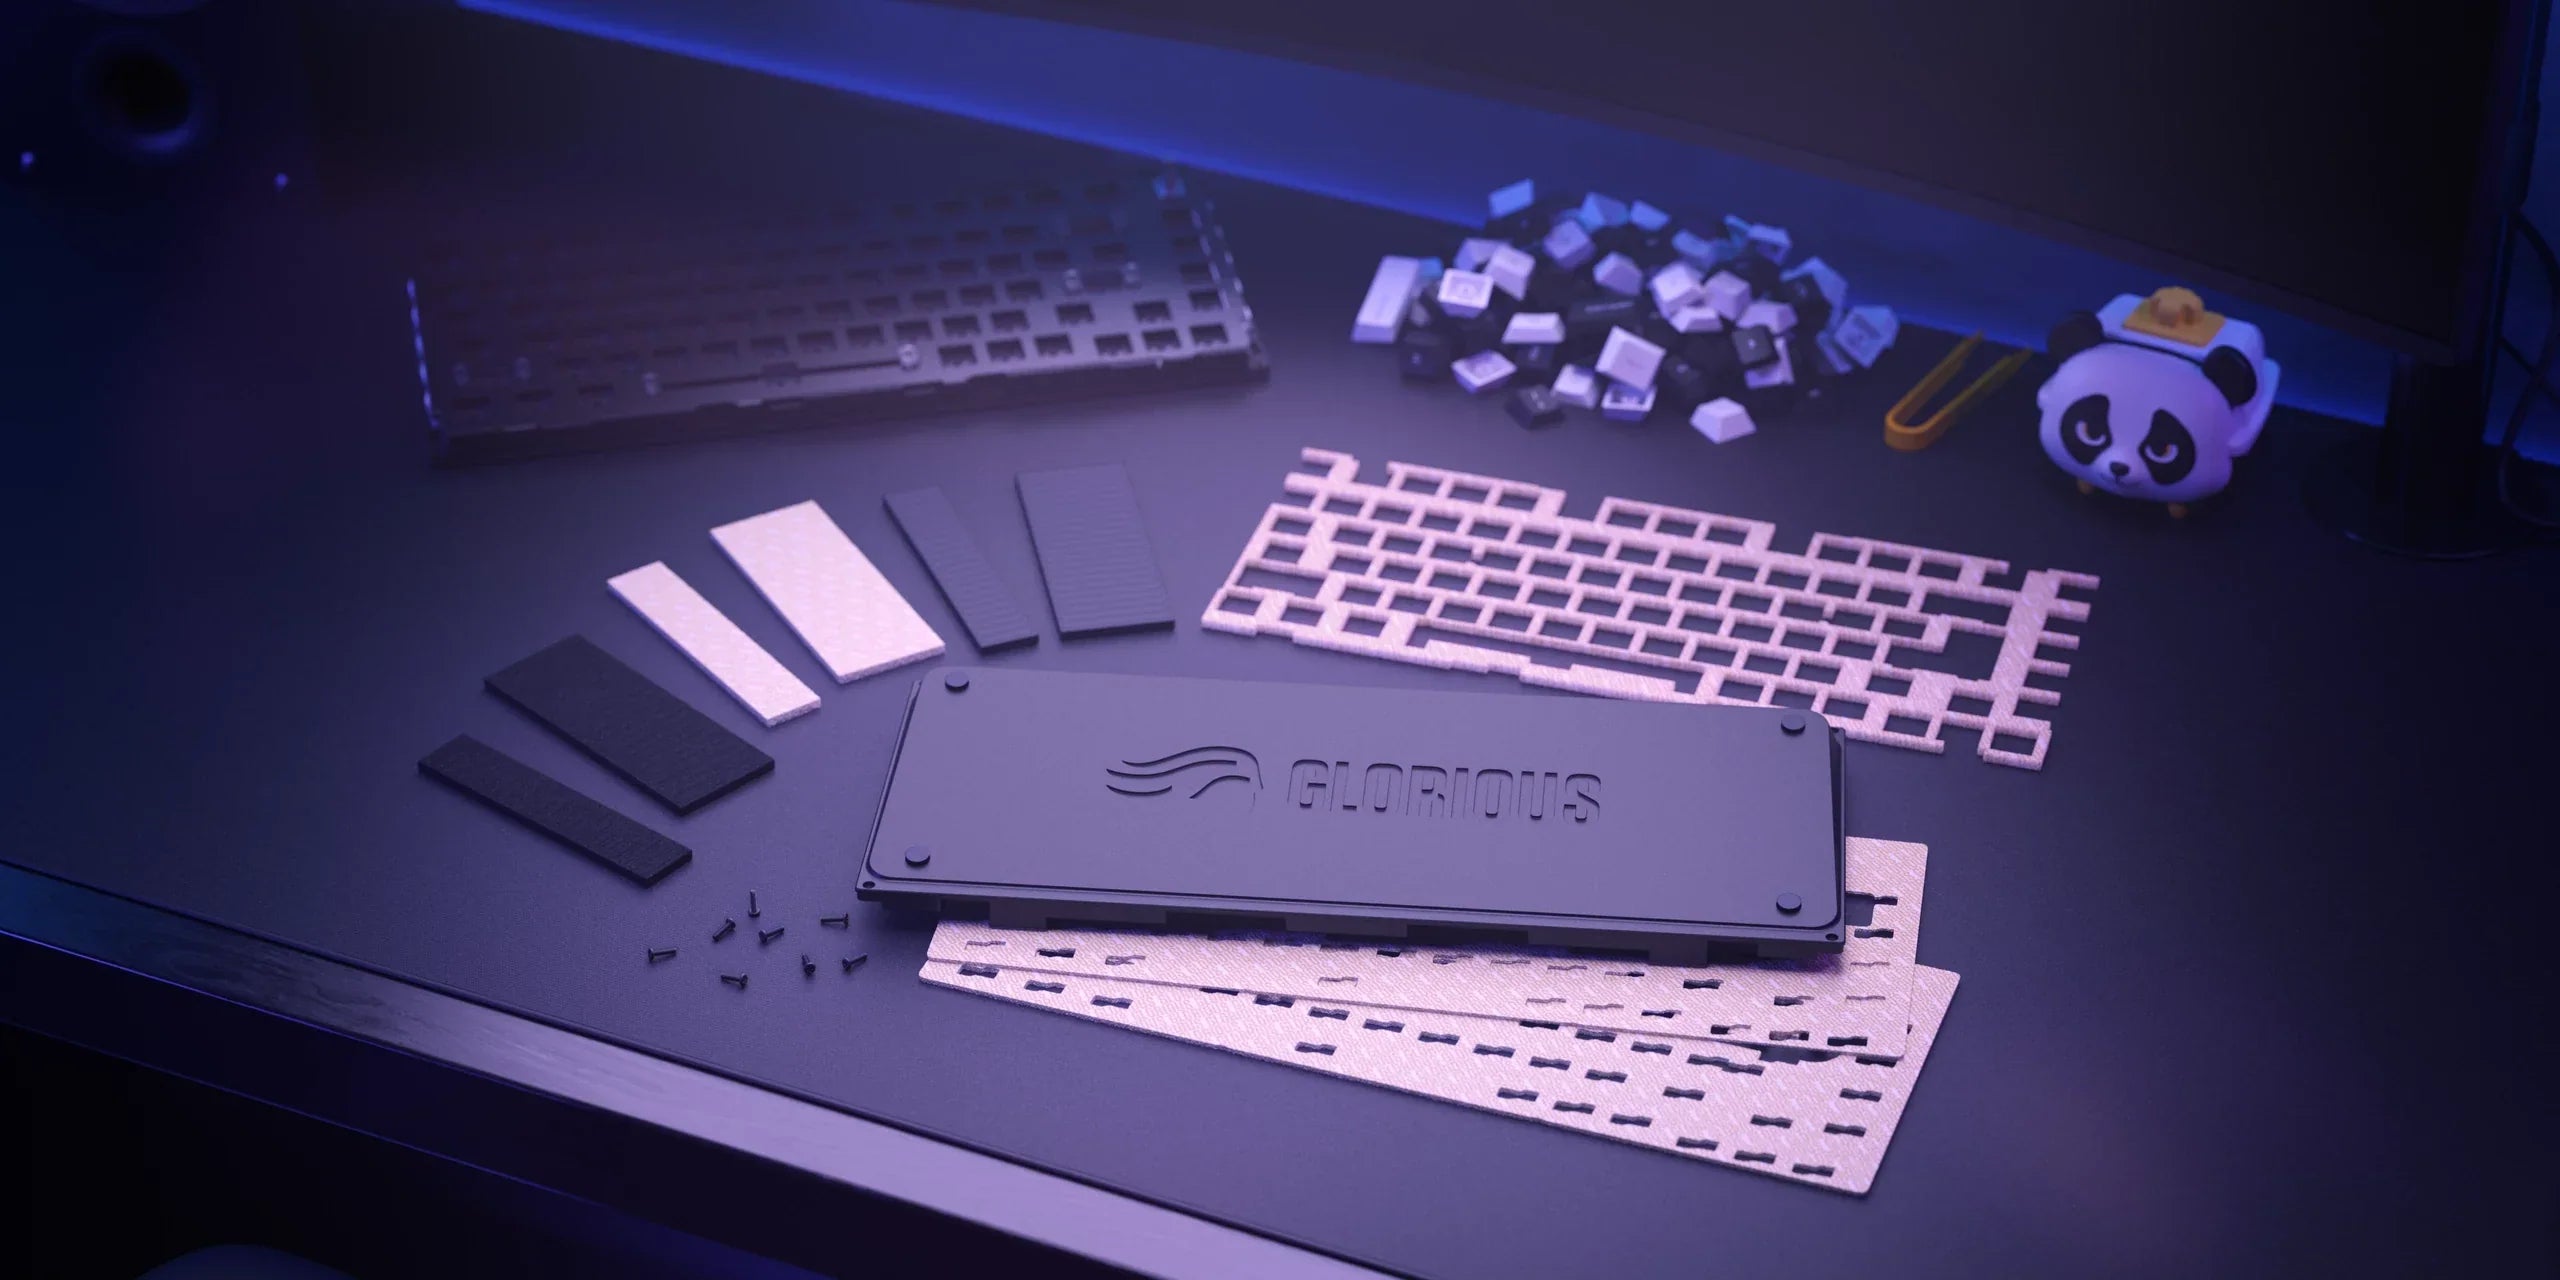
What's in the Box?
• 1× GMMK PRO Bottom Case
• 5× Case Screws
• 10× Pre-Installed G-Foam Gaskets
• 4× Pre-Installed Poron Gaskets
Keyboard Foam
• 1× G-Foam Bottom Case Foam (1mm Thick)
• 1× G-Foam Bottom Case Foam (2mm Thick)
• 1× G-Foam Plate Foam (3.5mm Thick)
3.5mm Thick Gaskets
• 44× Medium G-Foam Gasket Strips (22× 20mm Long, 22× 40mm Long)
• 44× Hard EDPM Gasket Strips (22× 20mm Long, 22× 40mm Long)
• 44× Soft Poron Gasket Strips (22× 20mm Long, 22× 40mm Long)
FlexKit Components
The world of keyboard customization is endless and can be overwhelming. The GMMK PRO FlexKit allows you to experiment with different configurations of gaskets and foam in order to create a unique keyboard that suits your own tactile and acoustic preferences.
Gaskets
There are three different kinds of gaskets included in the GMMK PRO FlexKit. Gaskets are installed on the high points around the edges of the bottom case to provide a softer point of contact with the top frame.
Poron gaskets will compress the most and offer a slow pop-back. G-Foam and EPDM gaskets will compress less, pop back faster, and soak up more sound than Poron.
We do not recommend using any leftover gaskets from the original GMMK PRO case with this kit.
Foam
Thinner case foam will allow more movement in the chassis (PCB, foam, switchplate assembly). However, less foam will allow for less sound absorption.
When taking the PCB from the original GMMK PRO, it is not necessary to change out the switchplate foam.
Configuration Suggestions
Use Poron gaskets with 1mm bottom case foam (or no case foam) for maximum flexibility.
Use G-Foam gaskets with 2mm case foam for a feel most similar to that of the GMMK PRO, but with a little more bounce.
This kit is compatible with neatly done tape mods; use 1mm or no case foam.
If you experience aluminum touching once the top frame is screwed in, replace the pre-installed case gaskets with 3.5mm Poron gaskets to ensure the PCB-A assembly sits where it should.
Opening the GMMK PRO
Tools Needed
• Philips #00 Screwdriver
• Sorting Dishes for Screws (optional)
Removing the Screws & Top Frame
1. Unplug your keyboard from your PC and keep it unplugged throughout this process.
2. Remove all switches, keycaps, and the rotary knob from your PRO.
3. Turn the board over so the embossed GLORIOUS logo is facing up.
4. Using a manual Phillips #00 screwdriver, gently loosen the 8 exterior case screws by a few rotations in the following order:
• Top left
• Top right
• Bottom right
• Bottom left
• Remaining 4 screws in no specific order
5. Once adequately loosened, fully remove each screw in the same order as step 4.
6. Carefully turn the board back over and lift away the top frame.
Removing the PCB
1. Carefully lift the PCB & switchplate (the chassis) from the front of the keyboard, ensuring that the wire connecting the USB-C PCB to the PCB at the back of the keyboard is not damaged.
2. Hold the chassis in place, close to the rest of the keyboard, and unplug the USB-C PCB from the main PCB.
Your GMMK PRO top frame and chassis (PCB & switchplate) are now ready to be installed in the FlexKit bottom case. If you want to swap your switchplate or stabilizers, this would be the time.
Removing the Daughterboard (USB-C PCB)
1. Unscrew the single screw securing the daughterboard into the bottom case.
• Some GMMK PROs have a small piece of foam covering the daughter board and screw. Remove this.
Assembling the FlexKit
1. Apply the included gaskets of your choice to the high points around the edges of the bottom case.
2. Install the daughterboard (USB-C PCB) into the bottom case.
3. If using case foam, lay the G-Foam in the bottom case, ensuring proper placement for access to the USB-C PCB.
4. Plug the chassis into the USB-C PCB (ensuring correct orientation) and place.
5. Install the top frame.
6. Reinstall switches, keycaps, and the rotary knob.
Additional Links
Support
Questions or concerns regarding your Glorious keyboard can be directed to our support team.
Note that Glorious is unable to offer comprehensive support for third-party firmware or parts (foam, gaskets, stabilizers, etc.) purchased from other companies.
Warranty Info
Important Notices
• 1-year limited manufacturer warranty
• Warranty does not cover damages resulting from the improper handling or installation of components.
• Gaskets and other small objects could be swallowed.
• Keep out of reach of children below the age of 10.